

You'll be needing that something to decorate (in this case we have a plain porcelain cookie jar), crayons, a sharpener/grater/pair of scissors, masking tape, stirrers, plastic drinking cups, and newspapers for laying out. Oh, and you'll need white glue! We forgot to include it for the picture. :(

First, lay out some newspaper to keep your work surface clean, especially since we'll be doing some crayon shaving.
We have a stash of crayons in the house, which were perfect for this project!
See how much we have:

Jade couldn't resist taking a close-up shot of the crayons.

We chose some blues and violets for decorating the panels of the porcelain cookie jar. Here's how the colors look like; we tried them out on the newspaper.

Ooh, merienda's arrived! Time for a snack break, courtesy of our dad, who bought some yummy Moshi Manju treats from Ever. The yummy yema and chocolate treats are bite-sized and easily gobbled down.


 |
| Sharpener, I choose you! |
 |
| Hmm, apparently, the scissors is better. Especially when the crayon breaks off and gets stuck in the sharpener. |
Here are the lovely shavings! Ooh, the colors! You can shave more than one color into the mixture. We actually shaved two different crayons to get the purple and blue mixes we used.


Mix in some glue until you get a sticky paste. You be the judge of how much glue will match the amount of shavings you've collected. It's best to put in the glue bit by bit and mixing, then adding more glue if needed.


Then apply the paste onto your surface! Use masking tape to define the shape. Since the cookie jar had an octagon shape (with eight surfaces), we wanted to put the paste on opposite sides.
You can use the stirrer to put on your colored goodness, but in the end we resorted to using our fingers to apply the paste evenly onto the surface. Dip your finger in water to prevent the paste from sticking to your skin.

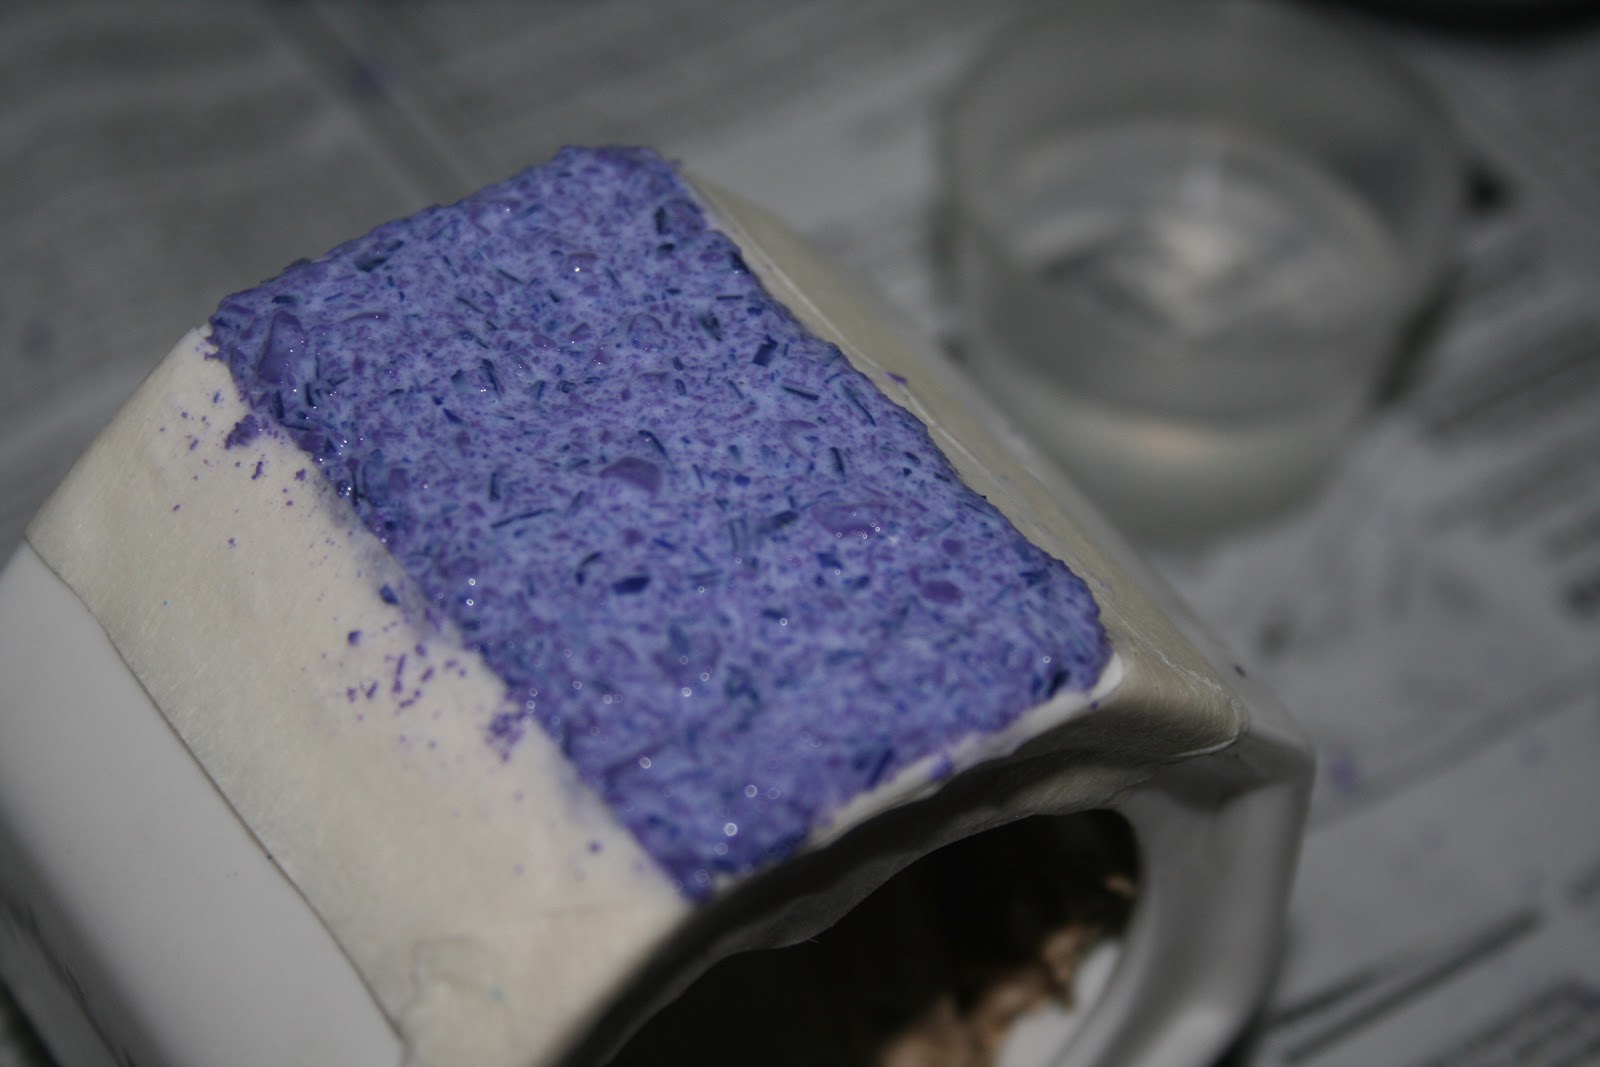
Remove the tape before the paste dries.While the shavings are still sticky, it's a good idea to remove any shavings from the surface. The glue dries clear, so don't be worried if the color isn't as vivid as you want it to be. Once the glue dries, the color will really POP!
Oh, and we noticed that if the surface isn't really flat, like the container, gravity has a hand in making the paste slide down the porcelain surface! Gah, 9.8 meters per second squared dilemma!
Oh, and we noticed that if the surface isn't really flat, like the container, gravity has a hand in making the paste slide down the porcelain surface! Gah, 9.8 meters per second squared dilemma!

Once it's dry, you'll have an interesting texture. :) Yay, now we have an eye-catching cookie jar that we can give as a gift!
No comments:
Post a Comment